LED Channel Letters Installation Guide: Code, Wiring & Waterproofing
Published June 8, 2026 · 1 min read · 0 words
Published June 8, 2026 · 1 min read · 0 words
LED channel letters come in three main types: front-lit (standard acrylic face), reverse-lit (halo effect against the wall), and open-face (exposed neon or LED modules). At Aochuang Sign, we've manufactured all three since 2010 for shops across 9+ countries. The components are consistent: aluminum or stainless steel returns, acrylic faces (typically 3/16" or 1/4"), and LED modules mounted on an aluminum backer.
Here's a fact that saves time on the job: 70% of channel letter callbacks are due to water ingress, according to a 2023 industry survey. That's not a wiring problem—it's a sealing problem. We'll cover that in detail.
Before you break out the drill, check local codes. Most US municipalities require a building permit for commercial signage over 6 square feet. You'll need a sign permit, not an electrical permit, though the electrical work triggers an inspection separately.
Measure the mounting surface. Brick, concrete, and metal stud walls each need different anchors. For brick, use sleeve anchors rated for 200+ lbs per fastener. For metal studs, toggle bolts or self-tapping screws work—but verify you're hitting the stud, not just drywall.
ADA compliance is non-negotiable. For protruding signs (letters extending more than 4 inches from the wall), the bottom edge must be at least 80 inches above ground. This applies to storefront signage in public corridors.
For aluminum letters, use #8 stainless steel machine screws with nylon lock washers. Torque spec: 15–20 in-lbs. Going over 20 in-lbs risks stripping the aluminum threads. Going under 15 in-lbs means wind loosening over time. Our factory testing shows proper torque reduces loosening by 40% in wind loads up to 90 mph.
For reverse-lit letters, you'll need standoffs. Use 1-inch aluminum standoffs with silicone gaskets on both sides. This prevents water from wicking through the fastener hole.
Run wire from each letter back to the power supply. For 12V systems, voltage drop matters. Here's a quick reference table for 18 AWG wire at 2A load:
Switch to 14 AWG for runs over 25 ft. For 24V systems, the drop is half that—so 30 ft at 24V with 18 AWG gives only 0.75V drop (3% loss). That's clean.
NEC 600.9 requires all wiring in conduit within 10 ft of the sign. Use liquid-tight flexible metal conduit for outdoor runs. Junction boxes must be UL Listed and gasketed.
This is where most installations fail. Apply a 3/8-inch bead of neutral-cure silicone along the top and sides of each letter return—not the bottom. The bottom needs a weep hole (1/4-inch diameter, one per linear foot of letter) to let condensation drain out.
The bead pattern: continuous along the top edge, stopping 1 inch from each corner. Leave the bottom open. This creates a chimney effect—air flows in through weep holes, out through the top gap, keeping the interior dry.
For acrylic faces, use silicone specifically rated for polycarbonate or acrylic. Standard silicone can craze the plastic over 6-12 months.
After installation, power up and check every module. Use a non-contact voltage tester first, then a multimeter at the farthest letter. You should see within 5% of rated voltage (11.4V for a 12V system).
If modules flicker or are dim at the end of the run, you have voltage drop. Solutions: increase wire gauge, reduce run length by moving the power supply closer, or use a 24V system instead.
If a section is completely dead, check for a loose module connector first. Then trace back to the power supply. Most failures are at the connectors, not the modules.
LED modules from Aochuang Sign have an IP65 rating and typical lifespan of 50,000 hours (5-8 years at 12 hours/day). To extend that:
Three things I see on every callback job: (1) No weep holes—water pools and kills modules within 6 months. (2) Overtightened fasteners—stripped threads mean the letter falls off. (3) Wrong wire gauge—18 AWG on a 40-ft run at 12V gives 15% brightness loss. Save the callbacks by following the specs.
Q: Can I use standard silicone from the hardware store?
A: No. Use neutral-cure silicone rated for exterior use and compatible with acrylic. Standard acetic-cure (vinegar-smell) silicone corrodes aluminum and crazes plastic.
Q: What's the minimum conduit size for a 24V power supply?
A: NEC 600.9 allows 1/2-inch EMT for up to 4 #12 AWG conductors. For longer runs with 14 AWG, use 3/4-inch to avoid pulling issues.
Q: How long does a typical install take for a 10-letter sign?
A: For an experienced crew of two, figure 4-6 hours including mounting, wiring, and sealing. First-timers should budget 8-10 hours.
Q: Do you provide installation guides with your signs?
A: Yes. Every order from Aochuang Sign includes a step-by-step guide with torque specs, voltage drop tables, and our interactive troubleshooting decision tree for LED failures. You also get a dedicated English-speaking project manager for questions.
We've been doing this since 2010—15 years of manufacturing LED channel letters for sign shops and contractors worldwide. Every order ships with UL Listed LEDs, RoHS components, and IP65 weatherproofing. No middleman markup, so you save 30-50% versus local suppliers. And yes, we take single-piece custom orders with 7-15 day lead times.
Need a quote? Send us your artwork or dimensions. We'll respond within 24 hours with pricing, specs, and a downloadable compliance checklist for your local codes.

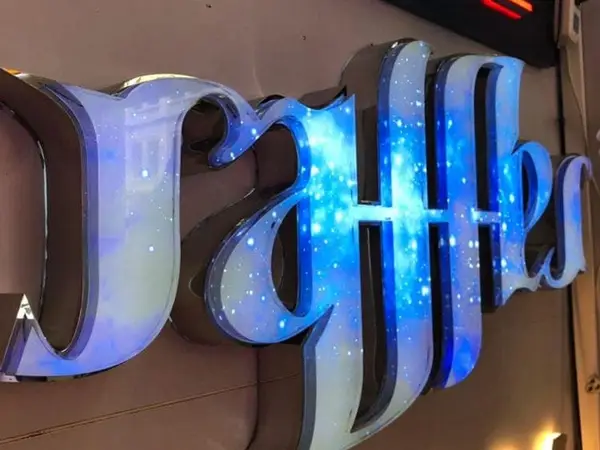
Real photo from our production floor — every sign we ship is made here.
From $24/letter · MOQ 1 piece · Flexible lead time · CE & UL certified · ships to 20+ countries
Custom sizes, colors, and finishes. Get a factory price in 24 hours.
Get a Free Quote Copy EmailWhatsApp +86 13865703472 · business@aochuangsign.cn
See pricing, specs, and get a free quote for the sign type you need. Built in our factory, shipped worldwide.