Outdoor sign installation isn’t where you prove how fast you can work.
I’ve watched a shop owner hang a $4,000 set of channel letters with drywall anchors because the wall felt solid. The whole thing came down in a March windstorm. The sign was fine—the install wasn’t. We build signs in a 3,000m² factory with 50+ workers, but here’s what we can’t do: dig holes, pull electrical permits, or tell a local inspector he’s wrong. What we can do is give you a step-by-step method that a professional installer would follow, and build the sign so it doesn’t fight you.
Look, you can’t install on a guess.
Measure the actual wall surface, not the blueprints. Concrete block, brick, stucco over foam, EIFS, wood framing—they all take different anchors. If you’re putting up front-lit channel letters on a storefront, the face might be 20 gauge aluminum trim over plywood. That won’t hold a 40-pound sign by itself.
That’s the first hard fact: know what’s behind the face. I’ve seen installers drill into a brick veneer, hit cavity, and then squirt a tube of construction adhesive in the hole like it’s load-bearing. It’s not.
Here’s what nobody tells you: your sign installation can be perfect and still fail because you skipped the permit.
US inspectors follow NEC Article 600 for electric signs. If your sign has a UL 48 listing, that helps, but the local inspector wants to see the label and the disconnect within sight. A UL 48 certification costs $4,000-15,000 and takes 4-9 months with quarterly audits. Most imported signs don’t have it unless you pay extra. We can supply a CE certificate from 20,000-50,000 RMB in 2-8 weeks, but that doesn’t replace local code compliance.
Plan power before you order.
A 120V circuit with a dedicated 20A breaker handles most small storefront signs. For a full pylon or monument sign, you might need 277V or a step-down transformer. I can’t tell you what your local utility gives you; your electrician does that. But I can tell you a cheap LED module with no water protection dies in 12-18 months, and that’s after you paid for the install. Our LED modules run L70 ≥50,000 hours, which is 5+ years of real lifespan if you use quality Samsung, Osram, or Blueview.
Mounting method depends on the sign type and the wall.
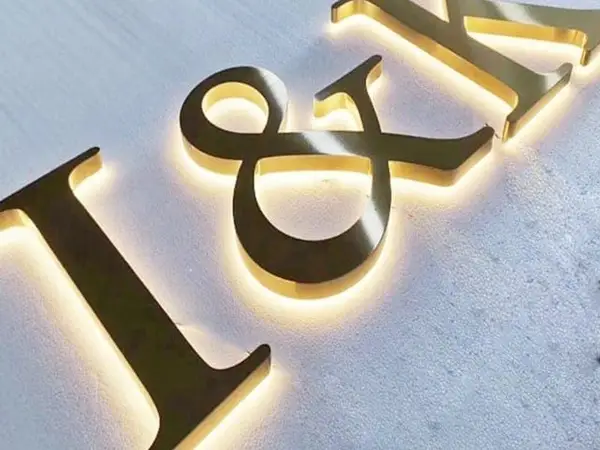
For back-lit halo letters, you need studs or standoffs that hold the letter off the wall 1.5 to 2 inches. That gap creates the halo. If you mount them flush, congratulations, you built an expensive front-lit letter. For stainless steel letters, you can use studs with clear silicone pads or VHB tape on flat indoor walls, but outdoors in wind-load areas, don’t trust tape alone.
The ugly truth is most outdoor sign failures aren’t the sign. It’s the install.
Wind load will rip a sign off before the LED burns out. In coastal areas you need stainless 316 with 2-3% molybdenum, not 304. 316 costs 20-30% more. For a strip mall in Ohio, 304 with 18% chromium and 8% nickel is fine for 10+ years. For Miami Beach, pay for 316 or watch the rust bleed down the wall in year two.
Mark the template with a laser, not a pencil line that moves in the wind.
Your sign factory should give you a full-size paper or digital template. Ours is cut on laser equipment with ±0.1mm accuracy, so if your holes don’t match, you drilled wrong. Use painter’s tape to hold the template, then center-punch each hole before drilling.
I’ve seen this go wrong: an installer used plastic wall anchors on a brick wall for a 30-pound sign. The sign survived two months. Plastic anchors are for picture frames, not outdoor signs. In solid concrete or brick, use sleeve anchors or wedge anchors rated for twice the sign weight. In hollow block, use toggle bolts or epoxy anchors. In wood, use lag bolts into the studs.
Each anchor’s pullout rating is on the box. Read it. If the sign weighs 50 pounds, your total anchor rating should be 100 pounds or more. That’s not overkill; that’s wind gust math.
Electrical is where DIY installs die.
Every outdoor wire splice needs a waterproof junction box or heat-shrink butt connectors rated for wet locations. If you’re installing acrylic light boxes, the power supply is often inside the box. It needs to breathe, but it can’t get wet. IP65 means dust-tight and water jets from any direction. That’s your minimum outdoor rating. IP66 handles powerful jets. IP68 is submersible for extreme weather. Cheap power supplies don’t last one year; our power supply warranty is 1 year, LED warranty is 2 years.
A drip loop costs you six inches of wire and saves you a $2,000 callback. Water travels down the wire, not up. Form a U before the junction so water drips off. And for god’s sake, don’t use duct tape as electrical tape.
We use neutral silicone at the factory because it won’t attack the acrylic or LED. You should use the same on site around any penetration.
Clear silicone is not a structural adhesive. It’s a sealant. If your sign is held on by silicone, you’ve already lost. But around wires and the top edge where water can sit, a continuous bead of neutral silicone stops capillary action. Allow 24 hours to cure before exposure to rain.
Level and plumb before you tighten everything. A 1/8-inch sag over a 10-foot sign is visible from the street.
Turn the sign on and leave it on for 8-12 hours. That’s the same aging test we do in the factory before it ships. If a cheap power supply or a loose connection is going to fail, it’ll usually fail in that window. Then do a final inspection: no light leaks, no gaps, all letters level.
Hand the client a folder with wiring diagrams, warranty card, and touch-up paint. Then walk away. If you did the install right, the only callbacks should be a new tenant in five years asking for a different logo.
Let’s be clear. We don’t install. We’re a factory in Lu’an, Anhui—3,000m², 50+ workers. We can’t send a crew to Chicago. But we can make your install easier.
We cut letters with ±0.1mm precision so your template matches. We bend, weld, grind, and polish stainless so the mounting surface is true. We install LEDs and seal with neutral silicone. We run every sign through 8-12 hours of aging and a 100% QC inspection. We pack in foam, carton, and plywood crate so it arrives without dings. After that, it’s yours.
Factory-direct pricing means you save 50-65% on product compared to US retail installed. But installation labor is local, and it should be.
Here are the four quickest ways to void a 2-year LED warranty:
None of these are the factory’s fault. But we’ll still get the angry email.
Ask us for the CE certificate, material spec sheets, and electrical drawings before you order. The good factories have them ready. The bad ones send you a photoshopped PDF.
From $16/letter · MOQ 1 piece · 7–15 day production · CE & UL certified · ships to 20+ countries
Custom sizes, colors, and finishes. Get a factory price in 24 hours.
Get a Free QuoteWhatsApp +86 13865703472 · cairuisheng@aochuangsign.cn
See pricing, specs, and get a free quote for the sign type you need. Built in our factory, shipped worldwide.