Mounting Methods • Permit Process • Electrical Code • Wind Load • ADA • Contractor Selection
The best-designed, most expensive sign in the world is worthless if it's installed wrong. A $5,000 custom channel letter sign mounted with the wrong anchors can fall off the building in the first storm. A sign with unsealed mounting holes will fill with water and short out within months. And a sign installed without a permit can get you fined — or ordered to remove it entirely.
Installation isn't the final step. It's the step that determines whether everything before it was worth doing. Here's what the data shows: roughly 60% of sign failures within the first two years trace back to installation errors, not manufacturing defects. Water ingress from poorly sealed penetrations. Electrical shorts from improper wiring. Letters falling off from wrong anchors. These aren't product problems — they're installation problems.
This guide covers every aspect of commercial sign installation: mounting methods, permitting, electrical code, structural engineering, waterproofing, and how to evaluate installers. Whether you're a contractor installing signs yourself or a business owner hiring it out, this is the reference.
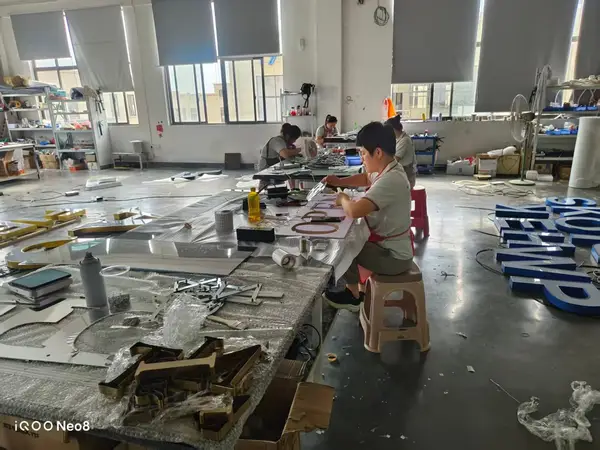
Factory insight: We've shipped signs worldwide. The installations that go smoothly share one pattern: the installer read the provided mounting template and wiring diagram before starting. The ones that go wrong share another: someone "eyeballed it." Don't eyeball a sign installation.
There are three primary ways to mount a sign to a building. Each has different aesthetics, costs, and structural implications.
Each letter mounts individually to the building surface using stainless steel threaded studs welded to the back of the letter. The studs pass through pre-drilled holes in the wall and are secured with nuts and washers from inside or with expansion anchors in masonry. Silicone sealant waterproofs each penetration.
Pros: Cleanest appearance. Letters appear to float on the wall. No visible mounting hardware. Cons: Requires one hole per stud per letter. A 6-letter sign might need 18-24 penetrations through the building envelope. Every hole is a potential leak point. Harder to service — each letter must be individually removed.
Best for: New construction where penetrations are planned, premium installations where appearance is paramount.
All letters pre-mount to a rectangular aluminum box (the raceway) at the factory. The raceway houses all wiring and power supplies. The entire assembly mounts to the building with far fewer attachment points — typically 4-6 for an entire sign.
Pros: Fewer wall penetrations. All wiring is contained and protected. Easier to service — open one panel, access everything. Preferred by property managers and shopping centers. Cons: The raceway is visible. Even painted to match the building, it's a metal box behind your letters. Less "floating" appearance.
Best for: Existing buildings where minimizing penetrations matters, shopping centers with landlord requirements, any installation where future service access is important.
Letters mount through or onto a decorative backer panel — typically aluminum composite material (ACM), painted metal, or acrylic. The backer panel mounts to the building first, then letters attach to the panel.
Pros: Creates a branded background. Can cover uneven wall surfaces. Fewer building penetrations than direct mount. Cons: More complex fabrication. Panel itself must be engineered for wind load. Adds $500-2,000+ to project cost.
Best for: Uneven wall surfaces, when brand color background is desired, multi-tenant buildings with varying wall conditions.
| Method | Appearance | Wall Holes | Service Access | Relative Cost |
|---|---|---|---|---|
| Direct Mount | Cleanest (floating) | 1 per stud (many) | Harder | $ (baseline) |
| Raceway Mount | Functional (box visible) | 4-6 total (few) | Easiest | $$ (+15-25%) |
| Backer Panel | Premium (branded) | 4-8 total (few) | Moderate | $$$ (+25-50%) |
Different building surfaces require completely different mounting hardware and techniques. Using the wrong method for your surface is the #1 cause of sign failures.
| Surface | Hardware | Key Concern | Special Notes |
|---|---|---|---|
| Brick | Expansion anchors or epoxy-set studs | Old brick can crack during drilling | Drill into brick, not mortar. Use hammer drill with masonry bit. Test anchor pull-out on scrap area first. |
| Concrete / CMU | Wedge anchors or sleeve anchors | Hollow CMU blocks need special anchors | For hollow block: use toggle bolts or epoxy screen tubes. Solid concrete: wedge anchors are strongest. |
| Stucco / EIFS | Long fasteners through to structural sheathing | Stucco alone can't hold weight | All load must transfer to plywood/OSB sheathing or studs behind. Thoroughly seal every penetration — stucco is highly water-sensitive. |
| Metal panel | Through-bolts to structural steel behind | Panel material cannot bear load | Must anchor through to girts or structural frame. Use nylon washers to prevent galvanic corrosion between dissimilar metals. |
| Glass | Generally NOT recommended | Glass cannot support weight | Use freestanding monument sign, overhead canopy mount, or interior-mounted sign visible through glass instead. |
| Wood siding | Stainless lag screws into studs | Wood rot around penetrations | Pre-drill and seal. Locate studs with stud finder. SS hardware only — galvanized will stain the wood over time. |
In most US and Canadian cities, installing an exterior illuminated sign requires a permit. The process is bureaucratic but predictable. Here's how it works:
Go to your city's building department website. Search for "sign permit" or "signage regulations." You'll typically find a document called "Sign Ordinance" or "Sign Code." Download it. Read the sections on:
Most building departments require:
Timing is everything: Permitting takes 2-6 weeks in most cities. Apply the day you place your sign order — don't wait for the sign to arrive. If you wait, the finished sign sits in a crate for a month while paperwork processes. We provide spec sheets and mounting details formatted for permit applications.
Permit fees range from $100 to $500+ depending on the sign's value and the city's fee schedule. Most cities now accept online submittals. Some still require in-person or mail. Processing times vary from 1-2 weeks (small cities, simple signs) to 6-8 weeks (major cities, complex installations).
After the sign is installed, the building department will send an inspector. They'll check that the installation matches the approved plans. If it passes, you get a sign-off. If it doesn't, you fix what they flag and schedule a re-inspection.
Illuminated signs in North America must comply with NFPA 70 (National Electrical Code) Article 600, which specifically covers electric signs and outline lighting.
One of the most common and expensive mistakes in international sign orders: ordering a 220V sign for a 110V country, or vice versa. The US, Canada, and parts of Latin America use 110-120V. Europe, Asia, Africa, and Australia use 220-240V. Always specify your voltage when ordering. We build every sign to your region's voltage — but we can't guess.
A sign mounted on a wall is essentially a sail. Wind pushes against it with surprising force. Here's what you need to know:
Most jurisdictions require stamped structural calculations when the sign exceeds certain thresholds:
An engineer's stamp costs $300-800. Don't skip it. If a sign fails during a storm and you didn't have an engineer's stamp when one was required, your insurance may not cover the damage — to your sign or to whatever it fell on.
Wind load is calculated as: Force = Wind Pressure × Sign Area × Drag Coefficient. A 6-letter sign with 18" letters (~6 sq ft total) in a 90 mph wind zone experiences approximately 120-180 lbs of lateral force. The mounting system must resist this with a safety factor of at least 2.0 — meaning the anchors should hold 240-360 lbs minimum.
The Americans with Disabilities Act regulates how signs are installed — not just how they're manufactured.
Important distinction: Channel letters and decorative building signs are typically exempt from ADA tactile requirements. ADA applies to room identification, directional signs, and wayfinding — not branding. But exit signs, restroom signs, and accessibility signs must comply fully. Check with your local code official if unsure.
Water is the enemy of illuminated signs. Every penetration through the building envelope — every mounting stud, every wiring entry — is a path for water to enter. Here's how to seal them:
| Factor | DIY | Professional |
|---|---|---|
| Cost | $0 (your time) | $500-2,000+ |
| Permit handling | You figure it out | Contractor typically handles |
| Equipment needed | Drill, ladder/lift, wiring tools | All included |
| Liability if something fails | Yours | Contractor's (verify insurance) |
| Warranty impact | May void if installed wrong | Professional installation preserves it |
| When to choose | Small, non-illuminated, ground-level | Illuminated, elevated, or permitted signs |
Not all sign installers are equal. Here's what to ask:
| Scenario | Install Cost | Permit Cost | Engineering | Total |
|---|---|---|---|---|
| 6 letters, 18", ground level, direct mount | $600-1,200 | $100-250 | Usually not required | $700-1,450 |
| 6 letters, 18", 2nd story, raceway mount | $1,000-2,000 | $150-350 | $300-500 | $1,450-2,850 |
| 12 letters, 24", 2nd story, direct mount | $1,500-3,000 | $200-500 | $500-800 | $2,200-4,300 |
| Large light box, 4'×8', storefront | $800-1,500 | $150-350 | $300-500 | $1,250-2,350 |
| Error | Result | Prevention |
|---|---|---|
| Wrong anchors for surface | Letters pull out of wall in wind | Match anchor type to substrate. When unsure, pull-test. |
| Unsealed mounting holes | Water inside wall cavity → rot, mold | Inject silicone in hole, seal around stud head |
| No weep holes in letters | Water pools inside, shorts out LEDs | Drill 1/8" hole at lowest point of each letter |
| Acid-cure silicone on metal | Corrosion where sealant meets metal | Use neutral-cure silicone only |
| No disconnect switch | Fails electrical inspection | Include external disconnect per NEC 600 |
| Studs too close to letter edge | Letter cracks at mounting point | Min 1/2" from stud center to letter edge |
| Different metals in contact | Galvanic corrosion | Nylon isolation washers between dissimilar metals |
| Not checking for utilities before drilling | Hit electrical conduit or plumbing | Call 811 (US) before digging or drilling into walls |
In most US cities: yes, for any exterior illuminated sign. Some cities also require permits for non-illuminated signs over a certain size. The fine for installing without a permit can exceed the permit cost by 10×, and the city can order you to remove the sign entirely. It's not worth the risk. Check with your local building department — it takes 10 minutes online.
2-6 weeks is typical. Small cities with simple sign codes: 1-2 weeks. Major cities (New York, LA, Chicago, Miami): 4-8 weeks. Historic districts add another 2-4 weeks for design review. Start the permit the day you order the sign.
For low-voltage LED signs (12V DC): possibly yes — many jurisdictions allow the sign installer to connect the low-voltage side. For the 110V/220V line-voltage side (from the breaker panel to the transformer): almost always requires a licensed electrician. Check your local code.
The inspector will give you a written list of corrections. Most are minor — add a disconnect switch, seal a penetration, adjust a mounting height. Fix them and call for re-inspection (usually $50-100). This is common and not a disaster. What's a disaster is proceeding without a permit and getting caught later.
We include stainless steel threaded studs, nuts, and washers with every sign. We also include a full-size paper mounting template and a wiring diagram. What we don't include — because it depends entirely on your wall — are the anchors (expansion anchors for masonry, lag screws for wood, toggle bolts for hollow walls). Your installer will supply the right anchors for your specific surface.
We ship worldwide with detailed installation guides in English. The sign itself ships pre-wired and tested. Your local contractor handles the installation using our templates and diagrams. We're available by video call if your installer has questions — having a factory technician walk them through it in real time has solved more installation problems than any manual.
Every Aochuang sign ships with a full-size mounting template, wiring diagram, and installation guide. Plus live video support for your installer.
Get a Quote with Installation Support → Copy EmailIncludes mounting template • Wiring diagram • Live install support
Explore specific topics from this guide in depth — each article is a comprehensive 1,500–2,500 word resource written by our factory experts.
Dive deeper with these in-depth articles from our factory floor.