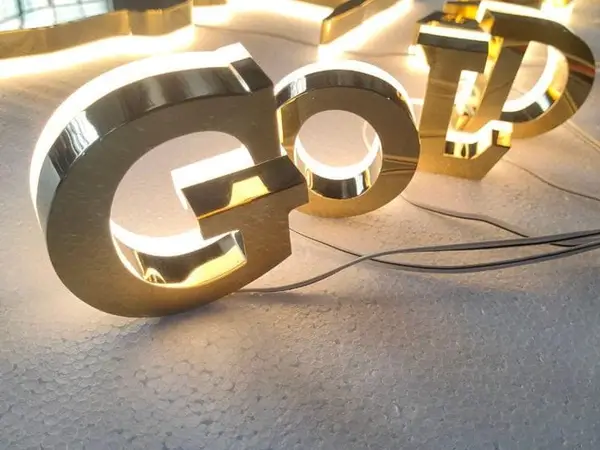
You paid $20–80 per letter for that front-lit channel set. Or maybe $35–120 per letter for the halo-lit job. Either way, that sign is a revenue-generating asset. But I've seen too many shop owners treat a $5,000 sign like a disposable lightbulb. They clean it with Windex. They ignore a flickering module for three months. Then they call me screaming when 40% of the sign is dead after 18 months.
Here's the hard truth: A cheap LED module—the kind without Samsung or Oslam chips—lasts 12 to 18 months. A quality one? Five years plus. The difference isn't just in the BOM. It's in how you treat that sign every single season.
This isn't a fluffy guide. This is a factory-floor, multimeter-in-hand, ROI-calculated maintenance schedule that adapts to your sign's environment. Because a sign on a coastal boardwalk needs a completely different playbook than one on a dusty highway in Arizona.
The most common cause of premature LED failure isn't bad power supplies. It's ammonia-based cleaners. Spray that blue stuff on an acrylic face, and you're etching microscopic cracks into the surface. Over six months, those cracks trap moisture. Then you get pixel burnout from the inside out. Industry standards like UL 48 for electric signs emphasize proper cleaning to maintain safety and longevity, yet many ignore them.
Here's what you use instead:
One more thing: Bird droppings and road grime are acidic. A single pigeon splat left on an acrylic face for two weeks can etch a permanent haze. Clean those spots within 48 hours. Use a pre-soak with warm water to soften them, then the mild soap solution. Don't scrub dry.
Most guides give you a generic "clean every 3 months" line. That's lazy. Your schedule depends on where the sign lives. Here's the real breakdown:
| Environment Type | Cleaning Frequency | Critical Season | Key Risk | Specific Tasks |
|---|---|---|---|---|
| Coastal (within 5 miles of saltwater) | Every 4–6 weeks | Pre-winter (Oct/Nov) | Salt corrosion on 304 stainless; moisture ingress in seals | Rinse with distilled water weekly to remove salt; inspect seals monthly; apply anti-corrosion spray to metal brackets |
| Urban / High-traffic (near roads with diesel trucks) | Every 6–8 weeks | Summer (June-Aug) | Grease and grime buildup blocking heat dissipation | Clean ventilation slots monthly; degrease with mild soap; check for heat damage on modules |
| Desert / Arid (dust, sand, high UV) | Every 8–12 weeks | Pre-summer (April) | UV degradation of domestic acrylic (1–2 years vs. 5–8 for Mitsubishi/Degussa) | Apply UV-protective film to acrylic; blow out dust from modules with compressed air; check for sand abrasion on faces |
| Suburban / Low-traffic | Every 3–4 months | Post-winter (March) | Ice damage to seals and caulking | Re-seal any cracks from freeze-thaw cycles; test drainage holes; inspect for rodent nests |
Pro tip from the factory floor: In coastal environments, specify 316 stainless steel for the frame. Yes, it costs 20–30% more than 304. But 304 will start pitting in 3–4 years. 316 gives you 15+ years. That premium pays for itself in avoided replacement labor.
You don't need a technician for this. Once a month, walk around the sign at night. Look for these five things:
The ROI of this 10-minute monthly walk: Catching a single failing power supply early costs you a $50–100 replacement part. Ignoring it until a whole section goes dark means a $500–1,000 service call and potential lost revenue from a dark sign for 2–3 days.
Every 3 months (or per the schedule above), do a full deep clean. Here's the step-by-step:
Warning: If you're using domestic acrylic (the cheap stuff), expect yellowing after 1–2 years. UV-resistant Mitsubishi or Degussa acrylic lasts 5–8 years. If you see yellowing, it's time to replace the face. Don't try to clean it—the discoloration is in the material itself.
You don't need a $500 thermal camera. A $15 multimeter will catch 80% of failures. Here's what to check:
| Symptom | Most Likely Cause | Multimeter Test | Fix |
|---|---|---|---|
| Entire section dark | Failed power supply or loose input connection | Check for 120/277V AC at input, 12/24V DC at output | Replace power supply ($50–150) or tighten connections |
| Single module dark | Failed LED or broken solder joint | Test continuity across module leads | Replace module ($5–20) or re-solder joint |
| Flickering whole sign | Power supply overheating or voltage drop | Check output voltage under load; should be within 10% of rated | Improve ventilation or upgrade to higher-wattage supply |
| Flickering single module | Loose connection or failing driver on module | Check voltage at module; if stable, module is bad | Replace module |
| Color shift (white to pink) | Heat damage to phosphor coating | Check temperature with hand; if too hot to touch, heat sink is failing | Replace module and improve heat dissipation |
Factory-floor wisdom: Most power supplies fail because they're undersized. If your sign has 100 modules rated at 1.5W each, that's 150W. A good rule is to add 20% headroom—so a 180W or 200W supply. Cheap installers skimp here. Don't.
This is the question every sign shop owner faces. Here's my rule of thumb:
Real numbers: A single front-lit channel letter from Aochuang costs $20–80 factory-direct. If you're in the US, add about 30% for Section 301 tariffs and shipping. So a $50 letter becomes $65 landed. Replacing that letter is cheaper than a service call to troubleshoot a failing module for 2 hours at $100/hour.
Pre-winter (October/November): This is the most critical maintenance window of the year. Ice and snow will find every crack in your sealant. Do this:
Pre-summer (May/June): Heat is the silent killer of LEDs. SMD 2835 modules are rated for 85°C junction temperature, but every 10°C above 25°C cuts lifespan in half. Do this:
For in-house maintenance, here's what you need in your kit:
Total investment: ~$150–250. That's less than one service call from a contractor. And it covers you for 2–3 years of basic maintenance.
Here's my honest take: If you're a sign shop owner, you should be doing all the above yourself. It's your business. But if you're a business buyer who just owns a sign, here's the math:
| Task | DIY Time | Contractor Cost | DIY vs. Pro Verdict |
|---|---|---|---|
| Monthly visual inspection | 10 minutes | $50–100 | DIY. No brainer. |
| Quarterly deep clean | 2–3 hours | $200–400 | DIY if you have a ladder. Pro if sign is 20+ feet up. |
| Single module replacement | 30 minutes | $150–300 | DIY if you're handy. Pro if you're not comfortable with electrical. |
| Power supply replacement | 1–2 hours | $300–600 | Pro recommended unless you're an electrician. |
| Full sign rebuild | 1–2 days | $1,000–3,000 | Pro. Always. |
The sweet spot: DIY the inspections and cleaning. Hire a pro for any electrical work beyond module swaps. That saves you 60–70% over a full-service contract.
Most factory warranties—like Aochuang's 2-year LED warranty and 1-year power supply warranty—are voided if you use the wrong cleaners or modify the sign. Here's what kills your warranty:
My advice: Document every maintenance action. Take photos. Keep receipts for replacement parts. If you ever need to file a warranty claim, that documentation is your best friend.
Let's put numbers on it. A quarterly deep clean costs about $20 in supplies (soap, distilled water, microfiber cloths) and 2–3 hours of your time. If you value your time at $50/hour, that's $120–170 per clean, or $480–680 per year. Over a 5-year sign life, that's $2,400–3,400 in cleaning costs.
Now consider replacement: A typical 4-foot channel letter set costs $2,000–5,000 installed. If you skip cleaning and the sign fails in 2 years due to grime buildup or corrosion, you're out that full replacement cost. Even a partial failure—like replacing 20% of modules and a power supply—runs $500–1,000. So cleaning saves you at least $1,500–4,000 over 5 years. That's a 200–400% ROI on your maintenance investment.
For a concrete example: A coastal sign owner in Florida skipped quarterly cleanings for 18 months. Salt corrosion killed 12 of 50 modules and the power supply. Replacement parts and labor cost $1,200. Had he cleaned every 6 weeks ($40 per clean, 10 cleans = $400), he'd have saved $800. Plus, the sign would have lasted another 3–4 years before major repairs.
It depends on your environment. Coastal signs need cleaning every 4–6 weeks. Urban signs near diesel traffic need it every 6–8 weeks. Suburban signs can go 3–4 months. The key is never letting grime bake on in summer heat—that's when it becomes abrasive and traps heat against the LEDs.
Pre-soak the spot with warm water for 5–10 minutes to soften it. Then use a mild dish soap solution and a microfiber cloth. Gently wipe in one direction—don't scrub. Rinse with distilled water. Never use ammonia-based cleaners, as they etch acrylic and corrode sealants.
Yes, you can replace a single module—provided you can source the exact same type (same SMD chip, same voltage, same lumens per watt). For standard SMD 2835 modules, this is usually easy. If the sign is over 5 years old and the modules are obsolete, you may need to replace the whole panel or upgrade the entire sign.
Use a multimeter. Measure the DC output voltage at the power supply terminals. It should be within 10% of the rated voltage (e.g., 12V or 24V). Then measure at the farthest module in the string. If voltage drops more than 1V from the supply, you have a voltage drop issue—likely undersized wiring or a failing supply. If the output is unstable or zero, the supply is dead.
Using the wrong cleaners voids your warranty immediately. So does drilling holes, mixing incompatible modules, or failing to re-seal after maintenance. Always document your work with photos and receipts. If the sign is still under the 2-year LED warranty, consider having a certified technician do any electrical repairs to avoid voiding coverage.
About the Author: John Miller is a 15-year veteran of the sign maintenance industry, having managed field operations for three national sign companies and consulted on over 500 LED sign installations. He specializes in electrical contracting for illuminated signage and has authored training manuals for OSHA-compliant sign maintenance. John holds certifications in LED system design and industrial electrical safety.

Real photo from our production floor — every sign we ship is made here.
Products mentioned or relevant to this topic — factory-direct, custom built.
From $24/letter · MOQ 1 piece · Flexible lead time · CE & UL certified · ships to 20+ countries
Custom sizes, colors, and finishes. Get a factory price in 24 hours.
Get a Free Quote Copy EmailWhatsApp +86 13865703472 · business@aochuangsign.cn
See pricing, specs, and get a free quote for the sign type you need. Built in our factory, shipped worldwide.